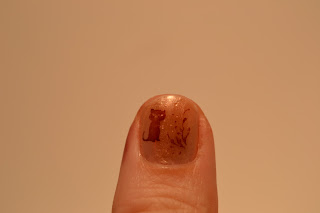
Tadpoles,
Once locating the proper silicone, Molds were next. I needed to determine the shape(s), I wanted to make. I know that on several pages on Facebook, there were requests for a square clear stamper. So I sat in my Nail room, scratching my head and it fit me. How about a small, large and square stamper. My issue was figuring out what molds could I use. Off to Walmart I went.
I was in the Walmart hardware isle for what seems 2 hours. While walking up and down the isle, I found these square furniture sliders and a package to sink stoppers.
Off to making my creations. I used Vaseline to coat the slider and stoppers. I did not want the silicone to stick to the molds. For the next part, I had to have the Husband help me with the caulking gun. I can't use my left arm and it was impossible for me to squeeze the caulking gun. He squeezed out enough silicone to fill the slider and the stoppers. Once they were filled, I used a piece of cardboard and leveled the silicone to match the sides of the molds. Next, was the hardest part for me to do. I placed the filled molds in a separate room so that I would no mess with them. They needed to cure. After 12 days, my creations were complete.
I know that 12 days, was a long time but I really want the silicone to set. I looked at the stampers very closely. Here is what I saw:
As you see, that all of the stampers have air bubbles in them. The small stamper had too many air bubbles in it causing me to dispose of it. The square stamper also had air bubbles in it but it did have a small in the corner that I could use. I cut out that area. Finally, the large stamper just had a long air bubble that ran the length of the stamper. So what I did was cut into the air bubbles and marked it so that the stamper could not be used. It would also note were I could hold the stamper.
 |
| Piece from square |
 |
| Large stamper with my finger over the air bubble marking. |
The only problem that I had was the same as with regular stampers, not picking up all of the imagines. I buffed it and they worked. I think that after playing with the stampers I will get better using them. Just like the other stampers. I thought that since the silicone was clear that I would be able to see through the stamper. But I figured out that the only way that could happen is to make a very thin stamper.
I decided to make several more stampers in an attempt to get all of the air bubbles out of the silicone. I am so excited to see what my future stampers will be like. I think that my husband is eager to make more as well.
I hope that you were not bored with this post since it was photograph heavy. Please if you have any suggestions in making more stampers, feel free to comment.
Have a great "hopping " day..


Awesome job and patience lol, a clear one that you could see through would be awesome!!!!!! xoxo
ReplyDeleteThanks Candace, I am working on some more stamps. Hopefully, I can make a totally clear one. I will let you know how it comes out. Thanks for reading the post.
DeleteDoes acetone melt the silicone?
ReplyDeleteJim, I have not noticed if it melts it when I am cleaning it up. Nothing comes off of the stamp. I will keep on eye out and let you know. Thanks for reading my post.
DeleteCool! I hope you find a way to get rid of the air bubbles.
ReplyDeleteThanks for reading Emily. I am working on getting the air bubbles out.
DeleteUse a stick, or something like back of a paint brush to stir and mix the silicone well after putting them in mould caps. The best way is to put a little silicone first, and use a paint brush to paint and cover the entire lining of the mould. After that put more silicone and let it cure. That will prevent the irregular bubbles.
Deletejust wet your finger and press the silicone down into the molds
DeleteThat is so fab! Great job!
ReplyDeleteThanks for reading Claudia.
DeleteAny follow up on these?
ReplyDeleteHere is someone who is making them: http://makezine.com/2011/07/05/how-to_make_no-carve_stamps/
ReplyDeletethat's amazing
ReplyDelete